
You do not have to install any third-party application. But Windows Firewall settings will serve the purpose.
How to Block Internet Access To Specific Software On Windows 10
Go to>> Control Panel >> System and Security >> Windows Firewall.
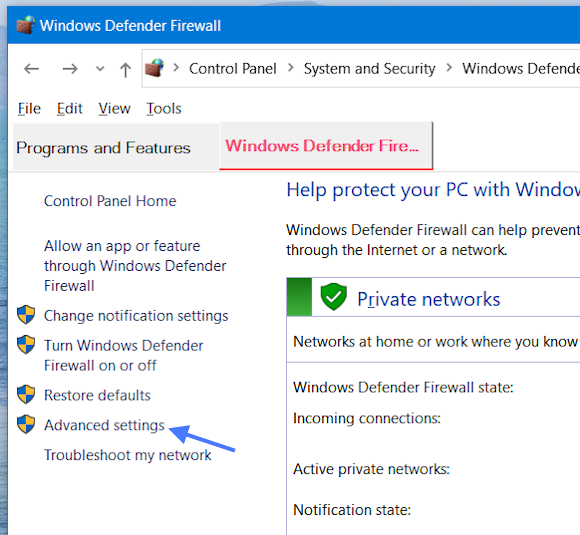
- Select Advanced Settings from the left options bar. It will open the advanced settings window.
- Click on the 'Outbound Rules' option in the left bar. It will give you a list of the executable applications/software that are currently allowed to access the internet without asking for permission.

- The list may not include the software or Windows Store application of your interest.
- Look for the app in the list and double click it to open the properties dialogue or you can right-click on the application name (In this case, it Store) and select 'Properties'.
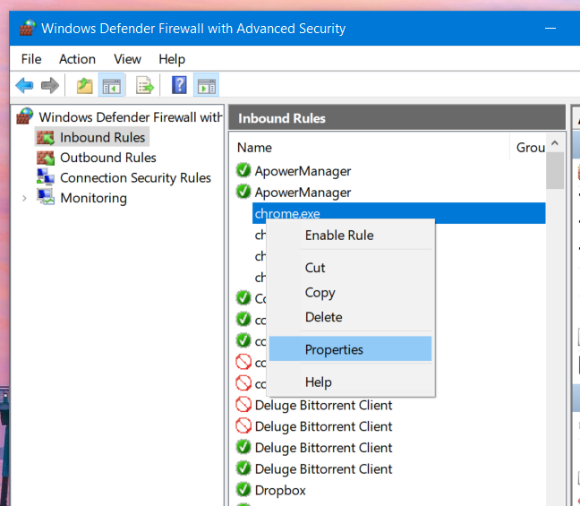
- In the properties window, select 'Block the connection' option from 'Action' and apply the settings.
Apps Not Available In List:
If the target application is not listed in the list of 'Outbound Rules', you can manually add it to the list and then block the application.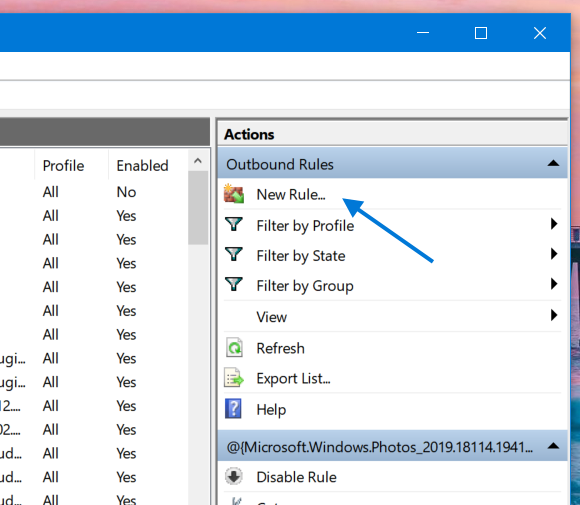
- To add a new application, click on the 'New Rule' option available on the right sidebar.
- Select 'Program' and click next. To add any new software application to the block list, select 'This program path' and click on the 'browse' button.
- Now locate the EXE file of that particular application you do not want to get connected to the internet.
- Suppose you want to block Google Chrome from accessing the internet. You can add it here. Just locate the EXE file of Google Chrome. Select it and then click on the Next button.
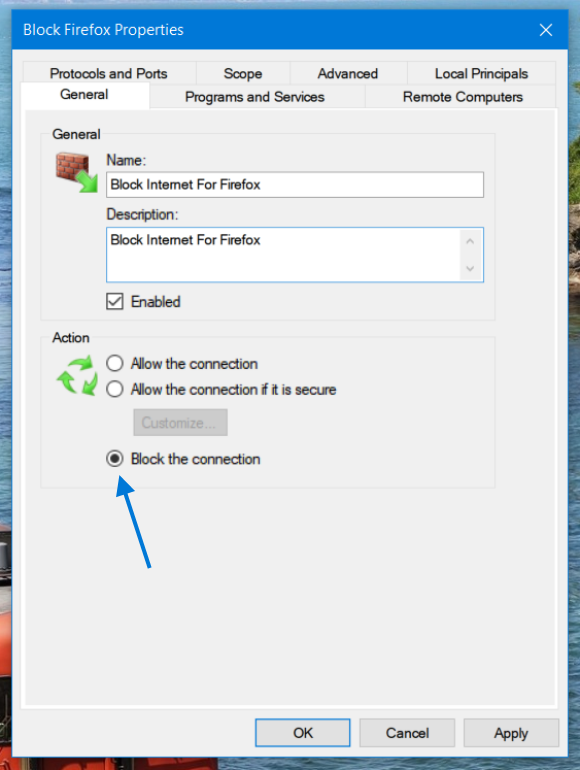
- In the last step, select how you want to block it. If you select the last option 'Block the connection', the software will not able to connect to the internet at all.
- If you select the other options like 'Allow the connection', it will connect as normal and the second option 'Allow the connection if it is secure' will allow the application to connect to the internet only if it is using SSL protocol to connect to the internet.
- Select 'Block the connection' option and click next, give an appropriate name for the rule and complete the wizard.
Don't forget to restart the PC to take the setting effect.
Why do you want to block the application from accessing your network? Is the tutorial working correctly? Please share.


0 comments:
Post a Comment